Premium bases
Games like Warhammer Quest and Blood Bowl frequently involve placing a model on its side to represent it being stunned or knocked down. If you're after a premium look and feel for your models, considering how the underside appears is a worthwhile investment.
I've been adding weights and magnets to my models then filling and covering the bases with velour to achieve this. Here is the process and the materials used:
- Approx. 1g lead weight split shot sinkers
- Adhesive putty e.g. Blu Tack
- Approx. ⌀ 1.6mm N52 rare earth magnets
- Spackling paste filler e.g. Selleys Spakfilla or Polyfilla
- Velour discs
- Super glue
Weights and magnets
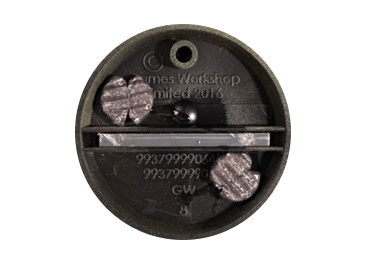
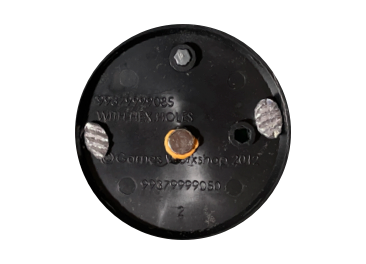
Make sure you're—at a minimum—wearing gloves while working with lead, and remember to clean up afterwards. Take the split shot sinkers and, using pliers, cut them in half and crush each until it's thin enough to fit under the base. Glue each piece at opposite ends.
Add a small piece of putty towards the centre of the base and lightly press a magnet into it. Flip the base over and rub it against a flat surface to ensure the magnet is flush with the edges and doesn't recede or protrude. A dot of superglue will secure it in place and ensure the putty hardens. Leave this to dry for at least an hour.
Filling and covering
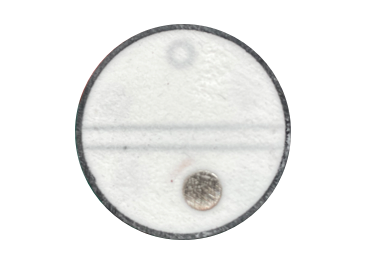
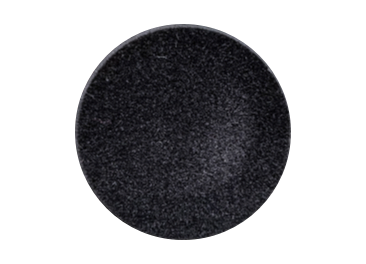
Fill the base and use a small plastic spatula to level it off. After leaving this to dry for about an hour, run the base over sandpaper to smooth it down. The final step is to place a velour disc over the filling, but there are a few important things to note here:
- Ensure the discs are about 1mm smaller in diameter than the base e.g. on a 25mm base use a 24mm disc. This prevents the material from sticking out and fraying over time.
- Leave this as the very last thing you do to your model—even after varnishing—as you don't want to get anything on the material.
The weight ensures your models are bottom-heavy so that they're less likely to tip over when on an uneven surface and, if dropped, are more likely to land on their base, reducing the chance of damage. The magnets enable efficient storage options and the velour is a nice touch that brings a premium finish to your models, reminiscent of a high-quality chess set.